News
Guest Tutorial: Pantile Church & Granary by Matt Smith December 29, 2017 22:41
Matt has followed my tutorial (just scroll down to find): yet slightly altered the mix by using textured exterior paint. Superb results, please follow the link.
http://thewargamestable.blogspot.co.uk/2017/11/spanish-church-and-grain-store-charlie.html

Guest Tutorial : Richard Clarke works on the New World Collection. December 29, 2017 22:21
Richard Clarke from TooFatLardies has recently put together a blog article on painting kits from the Charlie Foxtrot Models "New World" range. Richard kindly gave permission for me to copy his musings here. Thanks Richard.
A different take from my approach of spraying grey primer, spraying white primer and picking out boards with Foundry "Austrian White" 3 shade paint.
Way Down South in the Land of Cotton…
Plantations are odd things and certainly not very trendy in todays PC world, however, for a wargamer who enjoys the AWI and the ACW there can be no doubt that having a few relevant buildings to represent the agricultural heart of the old South is a boon. I have long been eyeing the superb buildings from Charlie Foxtrot which allow the gamer to create a whole plantation, but it was the release of their superb new pantile walls which saw me chuck a few in my basket on a ‘While I’m here…” basis.
Before I go any further, I should say that this is not a review of the Charlie Foxtrot products, this is a very particular and peculiar build project which I have undertaken to get the result and finished look that I want, so if you need a review of the basic model then you’ll need to look elsewhere. If you fancy some ideas about what you can do with MDF models then maybe there is something here for you.
The first step was to build the models. Nothing to see here, I just stuck them together with PVA glue. After I’d built them and roofed them they looked like this.
I should point out here that the plantation house does not come with tiles, it used etched MDF, something I always find a little disappointing, especially as it allows some of the lugs in the roof to show. As a result, I tiles the building with some of the laser cut roof tiles from Warbases. I believe Charlie Foxtrot do their own, but I bought an industrial quantity of the Warbases ones a couple of years ago and have more roof tiles than my local builders merchants, so I used them. I wanted a more formal European style of tile rather than the wood shingle one sees on so many US models, so I went with the one you can see. The other buildings are, a covered well (front left) a dairy (front right) and two ‘workers houses’, a polite euphemism for slave house. All of these came with roof tiles which I have added as per the instructions. Any small gaps have been filled with Polyfilla and sanded down.
Okay, so step 1 was to under coat the models. I used grey for the big house, the dairy and well and black for the slave houses and roofs. With that done, I began painting the buildings which would end up white. For this, I wanted a thin covering of white as I wanted to suggest a feather-edged look to the boards by painting the lower half of each a lighter colour than the top section. In the end, I went with a tube of acrylic which I have never really used as it is too wishy-washy and, frankly, this was a way to get rid of it. You can see how horrible the coverage was in the image below.
With that dry, I began to paint the lower halves of the boards in a brighter, more solid white, but watering this down slightly as I wanted to use a highlight later. It was now that I realised that I am bloody awful at painting straight lines, but I tried my best.

Sadly, it wasn’t much of a job, but while that was drying I painted up all of the doors and shutters separately. Doing this now, rather than when they were attached, allowed a much cleaner line, in contrast to my planking!
I then persevered with the other white buildings until all of the planking was done and then added the window shutters and doors. 


Not exactly a work of art, but the shutters do cover up some of the worst wobbly bits. Anyway, now I looked at the lower windows for the basement. These were meant to go below the upper brickwork, but I had actually done some damage to the lugs when putting the building together.
Some larger MDF buildings do, I find, need some elbow grease and, for someone with little patience, I get a bit bored with being carful so had hammered the bit together with a small upholstery hammer I found in my father’s old tool kit. It had got the bits to fit, but a few edges had suffered. I decided to attach the window grills slightly higher up to cover these lugs. Like so…
With this done, I decided that rather than paint the brickwork, I would use some brickwork wallpaper that I had purchased for my Stalingrad project. I decided to practice on the smaller buildings first, so added some PVA to them. 
With that done, I added the brickwork paper which I had cut to fit. The brickeffect paper is great as you just use the lines on the brickwork to get a nice clean cut and straight line. 
As can be seen, I had a bit of an overhang, but this was trimmed off later. Pleased with them, I began working my way round the mansion and doing the slave house chimneys. It’s an idea to do a few at a time as it is CRITICAL that you take your time with this, doing one section at a time before moving on. Wallpaper expands horribly when damp, so use plenty of glue and make sure you are around to give it a squeeze every few minutes to keep it in the right place.
As can be seen in the above shot, taking it slowly means allowing the first face to dry before then adding more glue and wrapping the paper around the chimney. Slow as this may seem, it does get good results whereas any attempt to speed it up is almost guaranteed to bugger things up. More haste, less speed.
One important point is to remember to paint the top of the chimney in a brick red colour early in the process. Some of this will be on show so giving it the right base colour will be a great help.
On this model, I cut out single rows of bricks to add around the top chimney detail. When these were in place, I used a watered down brick read (actually Vallejo red leather) to touch the paper edges to colour any white paper edges.
With this done, I added white to the brick red and then painted detail onto the top of the chimney to suggest bricks.
The key thing to remember here is that you are not painting a perfect scale representation of a house. This is much more like painting scenery for a theatrical production; you just do enough to fool the eye.
With these added bits done, I had just done enough to complete my plantation. I went round with the final touch up of pure white to add a few edges. Here’s a few snaps of the finished products.
I am really pleased with these models as I think they are pretty unique now I have added my few bits to the excellent basic models. What I like to do is play to the strengths of MDF, such as the fact that it represents wood very well, but where it is less successful I try to add other products.
You can find the Charlie Foxtrot models here: Charlie Foxtrot
New Release: 28mm 1:56 "Pantle Walls & Gates" November 20, 2017 16:58
Five new kits are released today: walls both high and low, corner walls (high & low) and 2 styles of gate (also high & low). Making the masters for the resin parts was a real "old school" change to using a mouse.


Neverending Wars Battletiles Kickstarter November 6, 2017 09:52
I have been involved from the start of this project with ideas being bounced between Michael and myself until the tile and marker system were finalised. Charlie Foxtrot Models will be manufacturing the MDF and acrylic components for this exciting game concept. Please follow the link to read up on this project. After the Battletiles were developed, Games Workshop has released Shadespire...Neverending Wars Battletiles could also be further customised to fully personalise that system too. Please act quickly, the kickstarter ends on 20th Novemeber 2018!
https://www.kickstarter.com/projects/1464249041/neverending-wars-battletiles?ref=nav_search

New Release: 28mm 1:56 "Pantile Carthouse" October 29, 2017 20:31
The 10th building in the Pantile Collection is a rural style building. Carts and agricultural equipment is stored below and people live on the 1st floor. Ideal for Peninsular War, Pirates, Italian WWII or given a coat of whitewash, Mexican settings. Pantile carthouse by Charlie Foxtrot Models, redcoats by Front Rank, expertly painted by Paul Buller.
Model to be released at Crisis 2017 and instore on our return


New Release: Ip Skirmish "Twin Trays" October 19, 2017 13:28
Today sees the release of 3, 4, 6 & 8 man movement trays for models based on a UK 1p. Each of the trays has 3 variants and all "interlock" to get a huge variety of configurations. I have also listed the 3 man "Twin Trays" for models based on 25mm round bases to complete that set too. Please watch this space as I am currently working on 5 kits at the same time. The first should be ready for Crisis...the other 4 for Reading.
New Release "4/8 Man Twin Trays" September 26, 2017 11:05
Designed to interlock with last weeks release 6/12 Man Twin Trays, the 4/8 man trays (for 25mm bases) increase flexibility, making the trays suitable for 4 man Hearthguard in Saga or 10 man units in Bolt Action.


New Release: "Twin Trays" September 21, 2017 10:37
Responding to a design brief: I play Sharp Practice and Saga and want trays that I can use for both rulesets. This is what I came up with, "Twin Trays". There are 4 different trays, sold in pairs to make either 2 x 6 man or 1 x 12 man movement trays.
In one set the "Twins" are not identical in the other 2 sets they are.
As all 3 tray packs "link" together there are a huge range of configurations for other games. Moving hordes of Zulus or zombies comes to mind. Remove a tray when taking 6 casualties, reform in different widths, mirror flip the trays when gluing to have even greater variety.
Note: holes are 25.4mm allowing a painted 25mm a "Goldilocks fit".


New release 28mm 1:56 "Pantile Store" September 12, 2017 09:49
The "Pantile Store" is the smallest kit in the collection designed as a supporting building to place alongside the "Pantile Stables" or pad out the grounds of something larger like "Pantile House 2". The last picture shows the Pantile Store with last week's release "Pantile Hermitage". This is the 9th kit so far in the range and a further two at the pencil drawing stage.
Suitable for Spanish, Mexican, Italian or Carribbean settings. Through Pirates, Peninsular War, Spanish Civil War and WWII.


New Release 28mm 1:56 "Pantile Hermitage" September 8, 2017 10:43
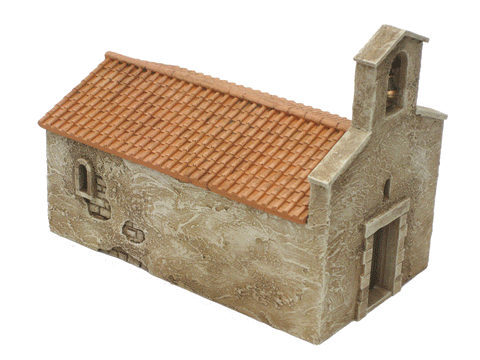
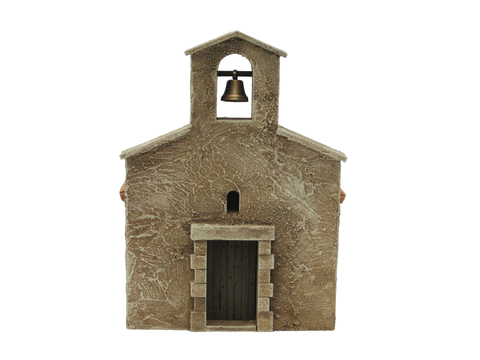
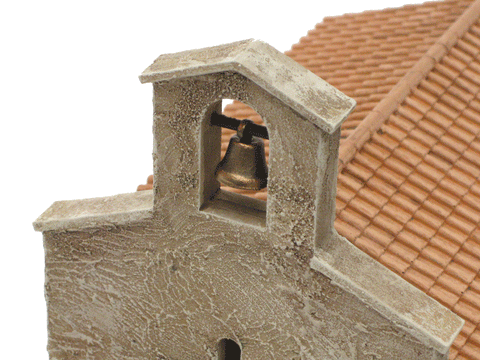
The "Pantile Hermitage", (also known as La Hermita or Ermita) is now instore. Built from the late 15th century, this model may be used in Pirate, Peninsular War, Mexican, Spanish Civil War and World War II settings. The kit, complete with hanging bell, may also be used as a chapel in small villages.
This is the 8th kit in the Pantile Collection..the 9th will be out next week!


New Release: 28mm 1:56 Rustic Pigsty & Pen August 29, 2017 10:00
In addition to the recently released "Rustic Fences" I am releasing the "Rustic Pigsty & Pen" kit to expand the Eastern Front / Fantasy range. The last picture shows the Rustic Pigsty & Pen next to the unclad Pigsty & Pen.


New Release: Fantasy Ogre "Big Shields" August 25, 2017 11:26
I am pleased to release a set of 6 Ogre Big Shields. Supplied in unpainted 2mm MDF engraved with designs as shown.
Laser cut from 2mm MDF the big shields are suitable for converting ogres into Kings of War "Siege Breakers" or upgrading a character to "Siege Master"
Shields are supplied with a central engraved "boss" this could be further enhanced from your bits box.
Designed initially for my personal collection and now added to the site for other KoW Ogre players. Shields are blu-tacked into place using existing Ogre Bulls before they get permanantly glued to my new yet to be painted unit.


